Lectures & discussions
6.1: Elbow room
Bring in some favorite comics pages of yours or have your students bring in pages they think have interesting layouts. Use tracing paper (or a colored pencil in Photoshop) to highlight reading paths, underlying grids, and so on.
Reading Order
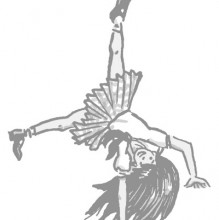
This is a minor point in the grand scheme of things, but it is a common error in beginners’ comics. It is worth keeping in mind that this problem is likely to show up occasionally in your students’ work—which might be a good time to refer them back to this page.
You may have examples of this particular layout that do work. Explain how devices like black spotting, careful composition, and word balloon placement can help readers find the correct path (as opposed to the desperate solution of using arrows).
Title Design
This section is a preview of title design and is meant to encourage students to start thinking about titles for their comics. More specifically, it gets them ready for their first attempt at title design in the Chapter 7 homework, “‘A month of Sundays’ penciling and lettering.”
6.2: Laying out pages, tiers, and panels
We have found that the idea of “live area”, while second nature to those who have been working with it for a while, can be quite hard for students to grasp, mainly because they tend to confuse the live area box with the edge of the printed page—which is why we’ve reviewed the distinction in “Inside the live area.” Plan on bringing in a few different kinds of comics to show examples of live area vs. page size. Bring comics in both ratios we discuss, the 2:3 comic book shape and the 3:4 magazine shape. It also helps to bring in a prose book and a magazine, both as further examples, as well as to underscore that the principles in this section apply to publishing layout in general.
Activities
Activity: Lay out your live area
We find that by the end of walking a class through this activity almost everyone is convinced they need a T-square. Inevitably some students don't have one, so encourage people to share. The students themselves will offer you plenty of opportunities for troubleshooting and reinforcing the lesson: not taping their paper down, not measuring twice, not double-checking that their layouts are square and so on.
Lay out your gutters and tiers
Feel free to introduce any of your own techniques, tricks, or shortcuts for measuring out gutters (and please share them with us!).
Further reading
Please see “Further reading” in
Chapter 3, and:
George Herriman,
Krazy and Ignatz
Dan Nadel,
Art Out of Time: Unknown Comics Visionaries 1900–1969
E.C. Segar,
Popeye
Brian Walker,
The Comics before 1945
Homework: "A month of Sundays" thumbnails
There are any number of ways you can teach this assignment. As we explain at the end of the section, we want students to concentrate on page layout and visual storytelling, and not sweat too much over the content of the story right now. Still, some students may balk at having a script handed to them. If you're willing to let them off the hook with this Chip script, you should still try to give everyone the same specific assignment: have them write their own story using "Chip and the Cookie Jar," or one using an existing comic strip character. Make sure that either way students follow the other instructions of the assignment: making a legible thumbnail of a one-page, four-tier comic, and creating, or at least leaving room for, a title logo. For classes that are following the Chip script, read through it and make sure everyone follows the story. Also make sure students realize they can tweak the style of the dialogue (in bold) but that the content needs to remain the same.
Extra credit: Comic book book report: Sunday page
This could easily be turned into a required homework assignment. It can be hard to fit reading and discussion into class along with studio work and critiques, but those skills are important components of learning about comics.
Homework critique Chapter 6: "'A month of Sundays' thumbnails"
A good way to lead off this critique (or any assignment where all students are drawing from the same script) is to review the contents of the script and then have students walk through one of the thumbnails in detail, trying to point out every single detail of the script. (You may want to pre-select one thumbnail that is either quite successful or which has instructive shortcomings.) Then for the rest of the thumbs you can have students point out only salient aspects of the comic—an element that works really well or something that they have trouble understanding. If they haven't done so already, when the critique is done, make sure students immediately write notes about the critique on their thumbs. They should then sit down and make changes either directly on the thumb, on a new sheet of paper, or by cutting and pasting useable bits of the original onto a new sheet of paper. It's important to reiterate often that thumbnails are where a large part of the work of cartooning is done. This sometimes violent re-making of the thumbs is why you can't let them get too precious about the drawing on their thumbnails. Once students spend valuable time making the drawing look great, they'll be very reluctant to redo anything. Examples of the homework with some comments from Matt and Jessica