Lectures & discussions
5.1 Penciling comics
This is the first chapter of purely hands-on, technical work. You don’t really need to plan a lecture on penciling, though it can be helpful to do a demo. You can use prepared materials (along the lines of the before-and-after pages we show on pages 53-54), or a set of original pencils of your own that demonstrate topics such as tracing, using multiple colors for different elements in a panel, and drawing outside the box. Alternately, you could use your students’ work for examples of how to (or how not to) do things, and demonstrate better solutions on tracing paper over their work. However, since students have only done thumbs so far for class, you may have a dearth of material for this approach.
If you don’t do a demo, just briefly going over the various techniques we name is a good idea to make sure that students understand what we’re talking about (and have read the material!).
5.2 Figuring out the figure 1: sticking to the basics
In our book, we don’t spend a lot of time on basic drawing skills. This is because there’s so much to teach about comics that there isn’t time or space to do so in one semester, in addition to the comics-specific skills. However, you may want to add more drawing components to your course. We would recommend, in addition to this simple figurette lesson, life drawing sessions and some work on perspective. We’ll cover perspective in our second volume.
Please note, also, some quick life-drawing assignments that can be done without a model, in Chapter 12.
Activities
Pencil one panel three different ways
This is essentially another composition exercise, where we try to get students to really think about the choices they are making in each panel. Your job will be to make sure their choices are really quite divergent in each version, and that they are challenging themselves in terms of what they're trying to pencil and what techniques they're using. For example, you might want to push students to try drawing outside the panel borders if they have drawn tightly-cropped images. In critique, you've got the same two jobs: talk about the compositional and style choices students have made, and point out the penciling techniques they've used to realize the panels. If they've taken shortcuts and produced panels that would benefit from penciling techniques that they skipped, you can ask them to rework the panels using those penciling techniques.
Sidebar
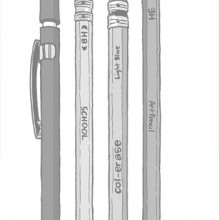
Penciling toolbox
You should take a few minutes to check that your students have brought in the required supplies. It's not so tough to come up with a pencil, but as we go on with the book, having the proper supplies on the proper day will be more and more important so as not to disrupt class with lots of trading, or drag a demo down with too many students who can't follow along.
A closer look: a master cartoonist's penciling method
Charles Burns's technique of building up panels with layers of tracing paper and lots of flipping the paper over may seem incredibly labor intensive, but you're likely to find there are some students it will help enormously to get the images on the paper the way they want them. Some students will need some modified version of this technique only occasionally, to solve specific, extra-problematic panels. In general, a light box is a great tool to have available to your class. This sidebar could be a springboard for a demo of different artists' penciling styles—your own.
Further reading
Jack Hamm, Drawing the Head and Figure
Eadweard Muybridge, Muybridge's “Complete Human and Animal Locomotion.”
Muybridge is a great resource for understanding bodies in motion. There are also mountains of photographic manga pose books that can come in handy.
Penciling
This assignment has a lot in common with the activity, with the difference that here, students are coming up with their own panel content, and we specify three planes of action. This means the panel will be relatively complex, and it may represent the first time some students have attempted a full background. Encourage students to be ambitious, and to be willing to trace parts of the panel that are working and start over, if things are getting wonky. Really, this assignment is all about getting students accustomed to the idea that often, one's first try at a panel doesn't fly, and a lot of work-arounds are necessary in order to get the image on the page as it should be. Two main points students should be taking away from this assignment are 1) the importance of taking this stage seriously, and 2) not allowing themselves to be lazy and let sub-par drawings slip by. Depending on the length and level of the class you are teaching, you could expand this assignment into a full comics assignment—that is, one where you have students pencil and ink complete comics pages—whether Jack and Jill (the "Closure comics" assignment), an assignment from later chapters, or an assignment of your own.
Practice drawing figurettes, Drawing figurettes by tracing photos
Whether or not you incorporate more drawing into your course, these two extra-credit assignments with figurettes will give a jump-start to students who haven't had other training, giving them a working model of how to lay out whole figures. You might bring in some photos of full-body poses to trace figurettes from in class.
General note: As with a few chapters in the book, this one is divided into two distinct sections: an essay on page design and a hands-on demo of how to lay out a page.
Homework critique Chapter 5: "Penciling"
As with previous assignments, you can always reinforce the lessons of preceding chapters by discussing composition and reading order and flow. Use tracing paper over the students' work to emphasize your points. You might want to have students post their three thumbs along with the final panel, and discuss compositional choices in terms of the paths not taken, as well. Look for penciling errors, like over-working a panel, scribbling in blacks, and too-loose images that will be hard to ink. Point out the penciling techniques taught in Chapter 5 will help to overcome difficulties. A point worth making strongly at this stage: have a ruler handy and check that everyone followed instructions as far as measurements (at least six inches high and eight wide), and planes of action. Following instructions in this manner is a very valuable professional skill you can impart to students without much effort. Click on the links below to see examples of the homework by students with some comments from Matt and Jessica.